How to Add GPS to iPhone Photos — Free & Instant
You shot a great photo on your iPhone, only to find it shows up without a location pin in Google Photos, Apple Maps, or your photo management app. No location. No map marker. Just an image with no geographic context.
This is a common problem — and it's fixable. You can add GPS coordinates to any iPhone photo retroactively, without reinstalling the Camera app or turning on location services for every app on your device. This guide explains why the GPS data is missing and exactly how to add it back.
Why Your iPhone Photo Is Missing Location Data
There are several common reasons an iPhone photo has no GPS metadata:
- Location Services disabled for Camera: If you have Settings → Privacy → Location Services → Camera set to "Never" or "Ask Next Time," the iPhone Camera app won't embed GPS into photos.
- Slow GPS fix: In areas with poor GPS signal — indoors, underground, or in dense urban canyons — the iPhone may take a photo before acquiring a GPS lock, resulting in no coordinates.
- GPS metadata stripped during sharing: When photos are shared via AirDrop from some configurations, iMessage, email, or saved from social media, GPS metadata is sometimes stripped from the file.
- Screenshots: Screenshots taken on iPhone never have GPS data — they're screen captures, not camera photos.
- Imported photos: Photos transferred from older cameras, scanners, or WhatsApp often arrive without any GPS data.
Whatever the cause, the fix is the same: add GPS coordinates manually using a geotagging tool.
How to Check If Your iPhone Photo Has GPS Data
Before adding GPS, it's worth confirming the data is actually missing. There are two quick ways to check:
Method 1: Apple Photos app
- Open the photo in the Photos app
- Swipe up on the photo to see the info panel
- If a map thumbnail appears with a location label, GPS data is present. If you see no map, no location name, and no coordinates — it's missing.
Method 2: FreeGeoTagger GPS Finder
Upload the photo to our GPS Finder tool. It will instantly tell you whether GPS data is embedded. If not, you'll see a message indicating no location was found — at which point you can use FreeGeoTagger to add it.
How to Add GPS to iPhone Photos Using FreeGeoTagger
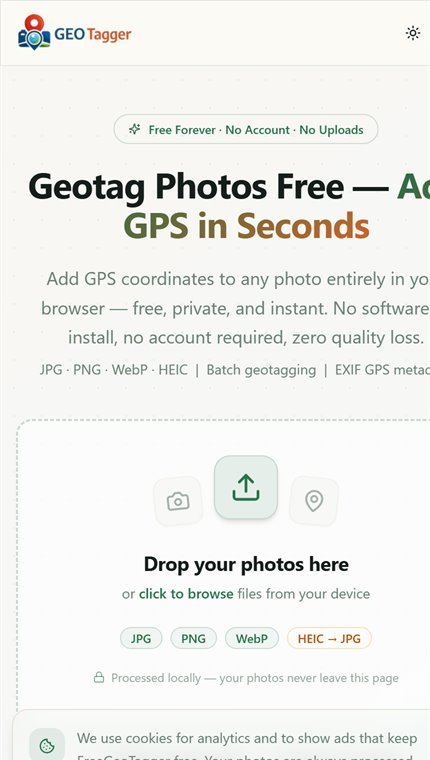
FreeGeoTagger is a free, browser-based tool that works on iPhone (Safari), Android, and desktop. Your photos are never uploaded to any server — all processing happens locally in your browser.
Step 1: Export the photo from iPhone
If you're working from your iPhone directly, open the photo in Apple Photos, tap the Share button, and choose "Save to Files" or use AirDrop to transfer it to your Mac or PC. This ensures you have the original file without any additional compression.
Alternatively, open Safari on your iPhone and go directly to freegeotagger.com — you can upload photos directly from your iPhone's Camera Roll.
Step 2: Upload the photo
Go to FreeGeoTagger and drag your photo into the upload area, or tap to browse and select from your Camera Roll. The tool supports HEIC (the native iPhone format), JPEG, PNG, and WebP.
Step 3: Set the location
The interactive map will appear. You have three options to set the location:
- Search: Type an address, landmark, or city name in the search bar. The map pin will snap to that location.
- Click the map: Pan to the correct location and click to drop a pin.
- Enter coordinates: If you have the exact latitude/longitude (from Google Maps, for example), paste them directly.
Step 4: Download your geotagged photo
Click Download. The tool embeds the GPS coordinates into the photo's EXIF metadata and downloads the file. HEIC files are automatically converted to high-quality JPEG for maximum compatibility with apps, platforms, and MLS systems.
There is zero quality loss — only the metadata is modified. The pixel data is untouched.
How to Verify the GPS Was Added Correctly
After downloading, upload the geotagged photo to our GPS Finder tool to confirm the coordinates are correctly embedded. The tool will show the location on a map and display the exact latitude/longitude stored in the file.
You can also import the photo back into Apple Photos and swipe up to see the location map appear — confirming the GPS data is now present.
How to Prevent Missing GPS on Future iPhone Photos
To ensure future photos automatically capture GPS, enable Location Services for the Camera app:
- Go to Settings → Privacy & Security → Location Services
- Scroll down to Camera
- Set it to "While Using the App"
With this setting, every photo you take will automatically embed the GPS coordinates of where you took it. For photos where you want location but are in a poor signal area, wait a few seconds after opening Camera for the GPS to acquire a lock before shooting.
Batch Geotagging Multiple iPhone Photos
If you have a set of photos from the same location — a trip, an event, a property shoot — you don't need to geotag them one by one. FreeGeoTagger supports batch upload: drag in multiple photos at once, set one location, and download them all with the same GPS coordinates embedded. You can download as individual files or as a ZIP archive.
Conclusion
Adding GPS to iPhone photos is fast and free with FreeGeoTagger. Whether your photo was taken with location services off, in a GPS dead zone, or imported from another device, you can add precise coordinates in under a minute — directly in your browser, with no app install and no account.
Frequently asked questions
Can I add GPS location to an iPhone photo?
Yes. Open the photo in FreeGeoTagger in Safari, set the location on the map or by address, and download the result with GPS coordinates written into its EXIF metadata. It works on the iPhone itself and needs no app.
Why do some of my iPhone photos have no location?
The most common cause is Location Services being disabled for the Camera app when the photo was taken. Photos also lose location when they are sent through messaging apps or social platforms, which strip metadata, or when exported as an unmodified copy.
Can the iPhone Photos app add a location itself?
No. The Photos app can adjust or remove a location on a photo that already has one, but it cannot create GPS data where none exists. Adding coordinates to a photo with no location requires a tool that writes EXIF metadata directly.
Will adding GPS reduce my iPhone photo's quality?
No. Only the EXIF metadata block is rewritten, and the compressed pixel data is copied through untouched. There is no decode and re-encode step, so no generation loss. HEIC files are converted to JPEG at high quality for compatibility.
Does the photo get uploaded to a server?
No. All processing happens in JavaScript inside your browser tab. You can confirm this by turning off mobile data and Wi-Fi after the page loads — the tool still works.